Introduction
Nice bright lighting for your 3D printer is almost necessary if you plan on doing any kind of timelapse of your prints. Lighting is also just useful when inspecting ongoing prints, or even just for taking glamour shots of your finished prints.
In this post, I'll show how I designed, installed and wired up this lighting setup for my Sovol SV06 3D printer.
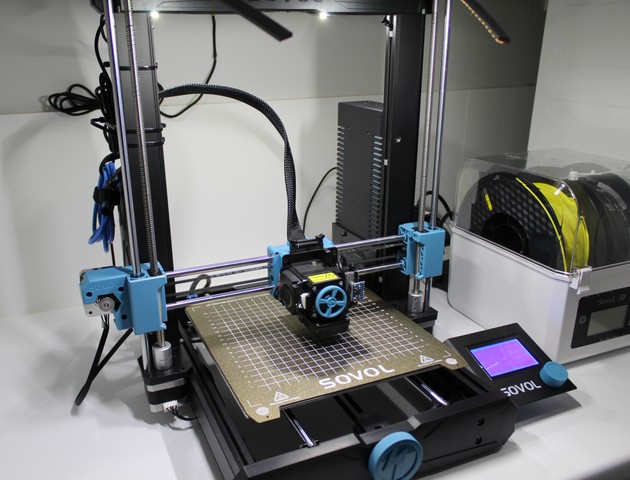
If you're interested in installing this lighting fixture yourself, downloads and links, as always, can be found at the end of this post.
Design
To keep the electrical design minimal, I used LED strips which are rated for 24v, which is the same voltage as the printer power supply, meaning they can be wired directly to the printer's power supply without any additional circuitry.
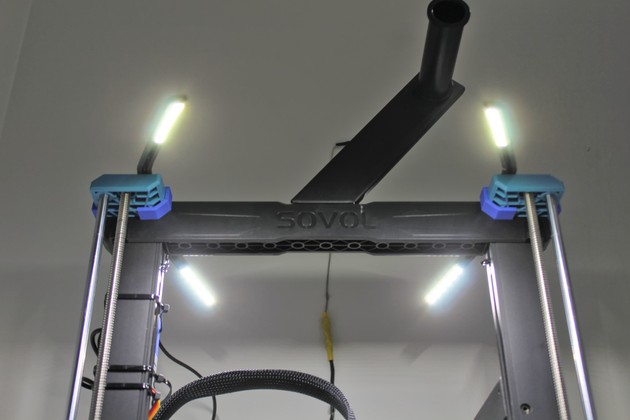
Next, the physical design of the fixture. To get the best possible lighting, the fixture requires six separate parts. The first two parts are the mounts that slide snugly onto the z-axis gantry endcap of the printer.
The remaining four light 'sticks' can have LED strips glued onto them. Wiring channels are built-in, so that cable management is discrete. After the light sticks are slid into the mounts, cables can be managed at the back of the printer so they are less visible. Note that the two light sticks over the front of the printer have space for a double length LED strip section (~100mm), while the two rear light sticks only have a single length (~50mm).
Printing
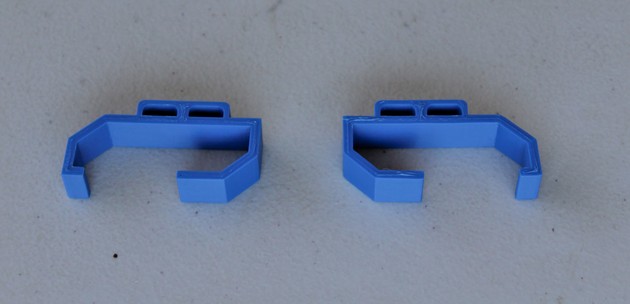
Printing the mounts are very straightforward, and do not require any supports. They don't have any thermal requirements, and can be printed out in any material.
I tried a couple of orientations for printing the light sticks and found that the below is likely the fastest and uses the least support material. Don't forget to add supports.
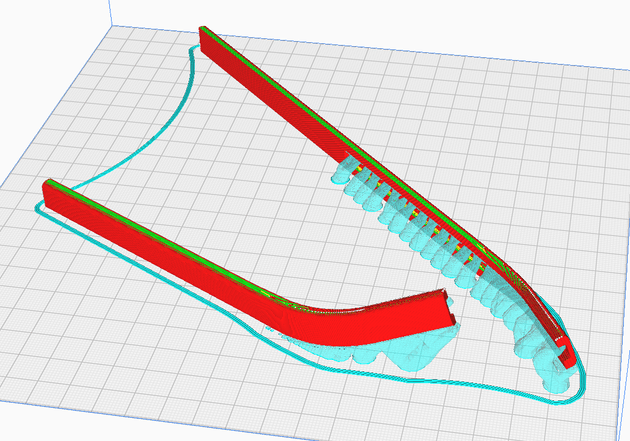
These also need to be printed out in a material that has decent temperature resistance. I eventually ended up with PETG, but I did notice that there was some very minor warping with even PETG. I would recommend using ABS, if you are comfortable printing with this material. If you are having issues with warping, another option is to add some circuitry to run the LED strips at a lower voltage.
Installation
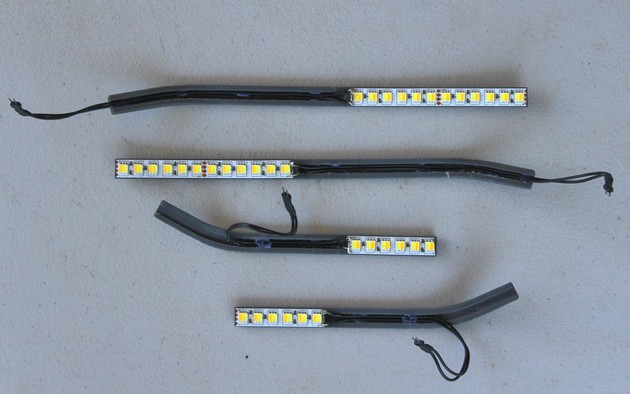
Firstly, prepare your LED strips by soldering adequate lengths of wires to them. For easier removal, I'd also recommend soldering male headers to the other ends of the wires (you can ignore polarities, since we can just flip connections as required).
Next, peel off the adhesive on the rear of the LED strips and stick them onto the flat sections of the light sticks. Then, route the wires through the channels and secure them in place with little dabs of hot glue.
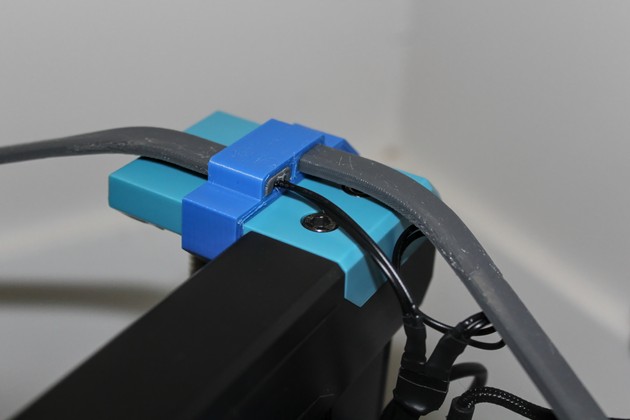
Slide the mounts onto the z-axis gantry endcaps of the printer, then insert light sticks into the corresponding slots on the mount, making sure to guide the wire through the mount to the rear of the printer.
Preparing Power Supply
⚠ Warning ⚠ messing around with the power supply (PSU) can put you at risk of electrocution, or even turn your printer into a fire-hazard if you do the wiring incorrectly. Proceed at your own risk.
Disconnecting your printer from the wall, and disconnecting the yellow XT60 connector coming out of the PSU, remove the PSU from the printer frame by unscrewing the two screws. Carefully remove the protective cover over the front of the power supply by unscrewing the four additional screws. This will expose bare metal connectors. Do not unscrew the screw terminal that connects to the XT60 connector.
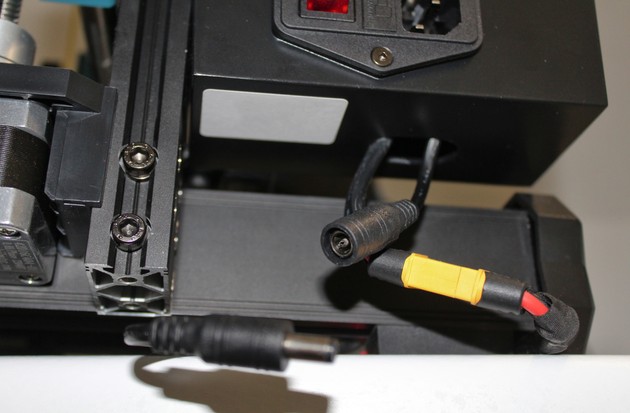
There should be a spare ground and +24v terminal that we can use for the lighting power. Unscrew each of these spare terminals, and screw in each wire of a female barrel jack connector. I highly recommend that you first prep the bare wire by soldering a spade connector onto it, so that the connection onto the screw terminal is secure.
You can now close the PSU back up, and screw it back onto the printer frame. Leave the female barrel plug extending outside the circular cutout on the bottom of the PSU cover. Don't forget to reconnect the yellow XT60 connector.
Wiring
Cut some wire to the required lengths to reach from the power supply to the right and left corners of the vertical gantry. On the ends that will connect to the light sticks, solder a couple of four female connectors, such that two light sticks can connect to the female connector set. On the side of the wire that connects to the power supply, solder a male barrel jack header. Cover any exposed wire with heat shrink or electrical tape.
Consult the wiring diagram below.
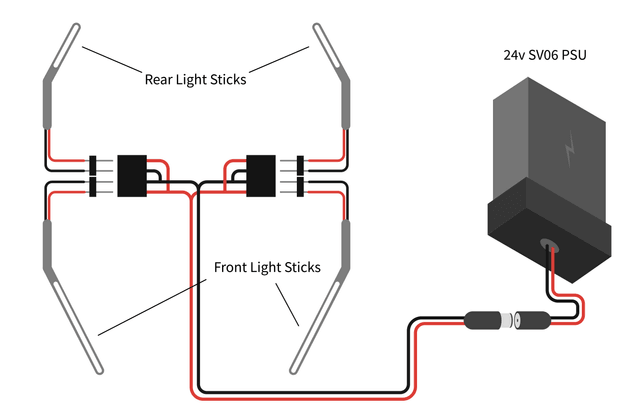
Once you have created your wiring harness, plug everything in and make sure all four light sticks work. Try reversing the connector direction on any light sticks that don't light up.
Cable Management
At this point you should have quite a few loose wires hanging everywhere. Let's neaten everything up. I designed the following inserts that can be printed out in TPU, then pressed into the aluminium extrusions that the SV06 frame is made from.
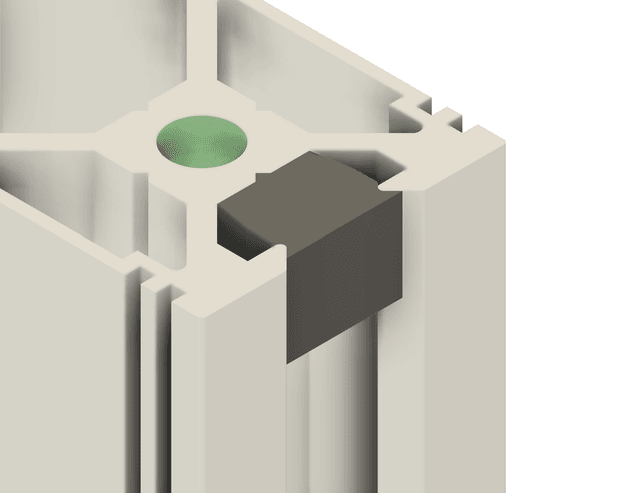
Guide loose pairs of wires into the channels on the aluminium inserts. Using some sort of long thin object, hold the loose wires against the sides on the inside of the channel. Gripping the TPU inserts with a pair of thin pliers, angle them and push them into the channel.
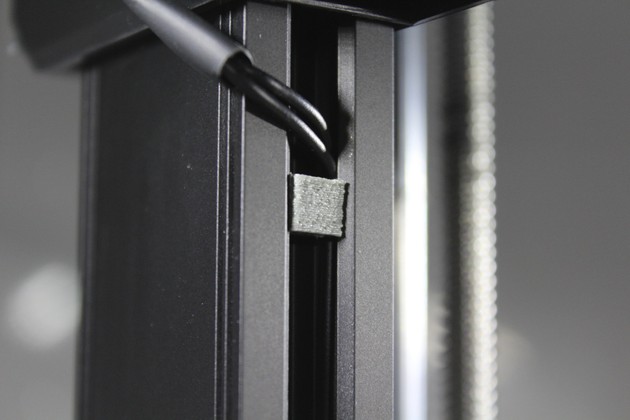
It might take a few tries to get the hang of, but once an insert is in, it should hold the wire securely inside the channel. The inserts can also slide along the channel, which makes adjusting the position of the wires very easy.
Final Thoughts
That's it! You should now have some nice lighting for your SV06 that lights up whenever the printer is powered on. If you want to turn off the lights, simply unplug the barrel jack coming out of the power supply.
Links and Downloads
Downloads
- Light Fixture 3D Models All Files → SV06_light_fixture_stl.zip, SV06_light_fixture_step.zip
- Light Fixture 3D Models
- Mount Left → SV06_lighting_mount_left.stl, SV06_lighting_mount_left.step
- Mount Right → SV06_lighting_mount_right.stl, SV06_lighting_mount_right.step
- Light Stick Left Front → SV06_lighting_stick_left_front.stl, SV06_lighting_stick_left_front.step
- Light Stick Left Back → SV06_lighting_stick_left_back.stl, SV06_lighting_stick_left_back.step
- Light Stick Right Front → SV06_lighting_stick_right_front.stl, SV06_lighting_stick_right_front.step
- Light Stick Right Back → SV06_lighting_stick_right_back.stl, SV06_lighting_stick_right_back.step
- Channel Insert 3D Model → SV06_channel_insert.stl, SV06_channel_insert.step
Purchase Links
- Led Strip 24v (these are just some examples, pick whichever LED strips work for you) → Amazon, Aliexpress